

Any real estate transaction carried out has to be registered with the respective sub-registrar within four months to make the transaction valid and legal.
In November 2018, the Karnataka government launched an online portal named Kaveri Online Services, which enables property owners to access the property and document-related services from their home.
After having published the step by step guide to online property registration in Delhi, which was much appreciated by our readers, we bring a similar guide to online property registration in Bangalore.
Step 1: User registration
Website: www.kaverionline.karnataka.gov.in
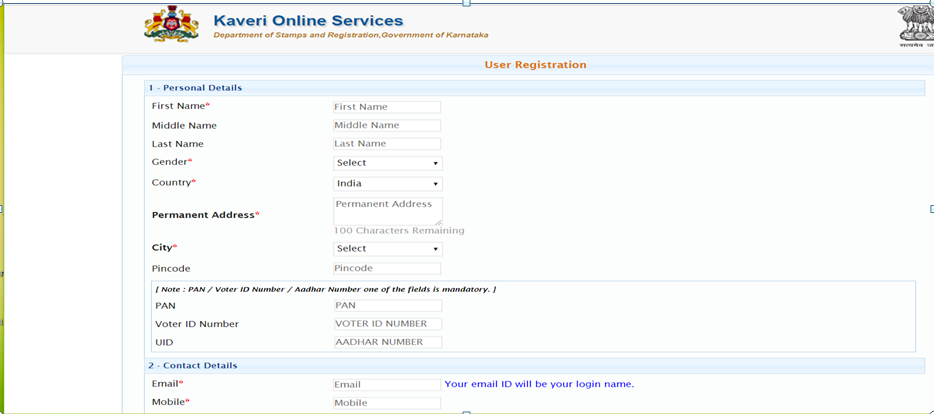
Before starting the process, one needs to register on the site, which can be quickly done with your credentials and one of the approved ID proofs.
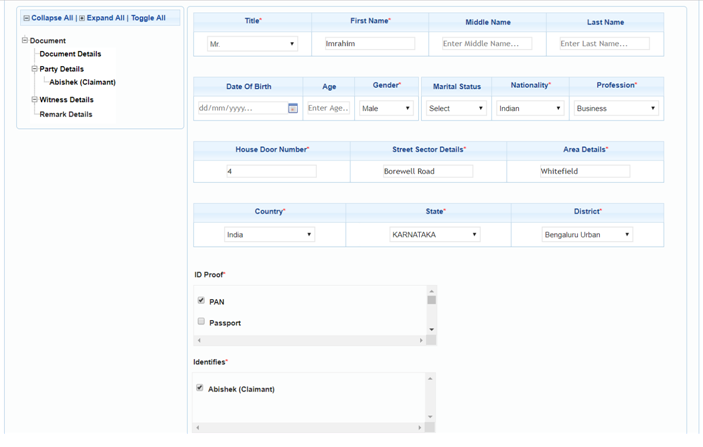
Step 2: Fill in the details of the parties involved with witnesses
Go to the document registration tab and proceed to fill in the required details of the parties, date of execution of the deed, and property involved in the transaction.
At this stage, you would need to fill in the document details, party details, witness details, and remark details after selecting appropriate tabs from the left-hand side of the web page.
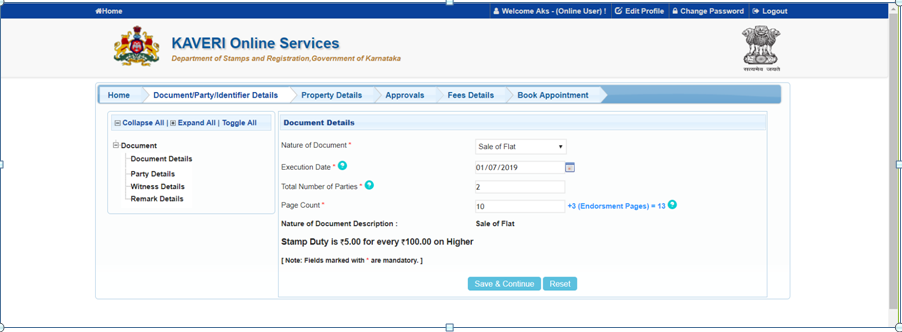
After filling in the document details, fill in the details for the total number of parties involved in the transaction. One or more of the individuals could be the executants and similarly the claimants.
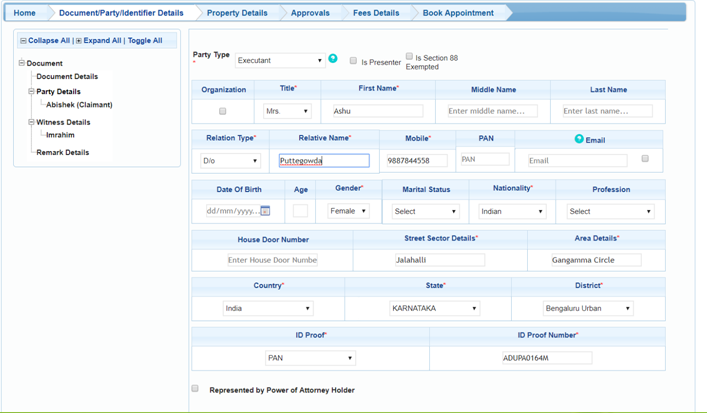
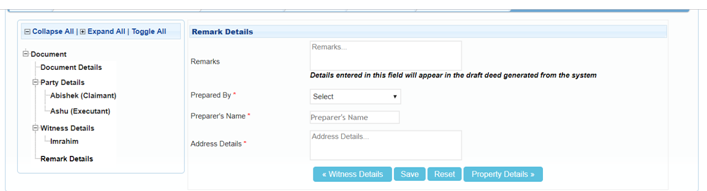
After filling in the details of the parties involved, fill in the details of the witnesses. Make sure to choose individuals that you know well. Also, give details of the Identity details of the witness.
Fill in the remarks tab with details pertinent to your transaction.
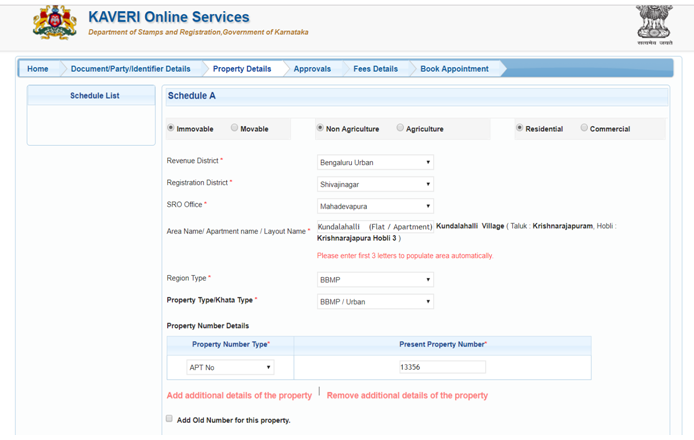
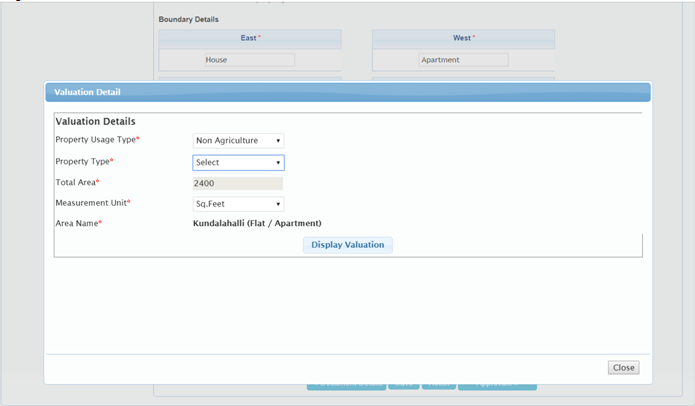
Step 3: Fill in the property details
Fill in the property details as required.
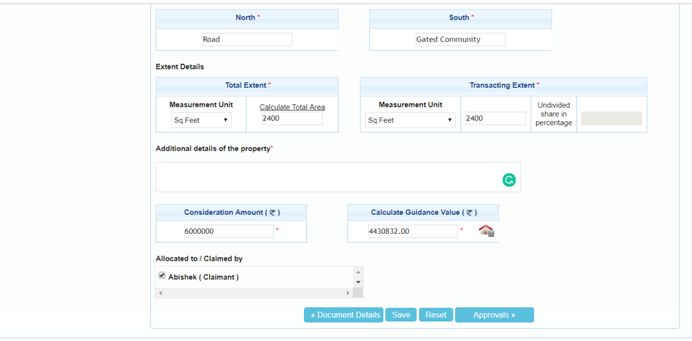
After you fill in the required details, you can do the same for the consideration amount. After that, click on the figure of a home under the tab, calculate guidance value. The registration amount cannot be less than the guidance value set by the government.
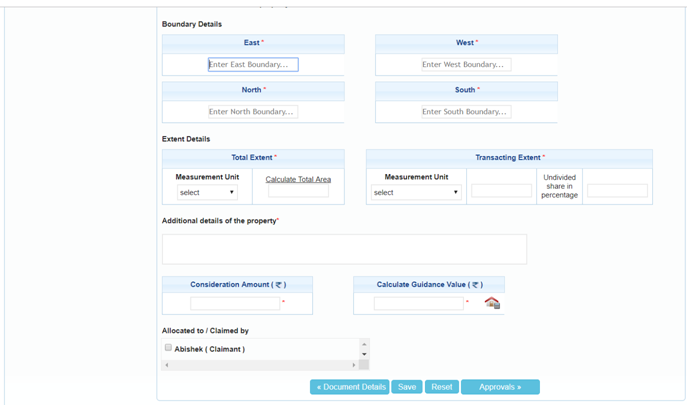
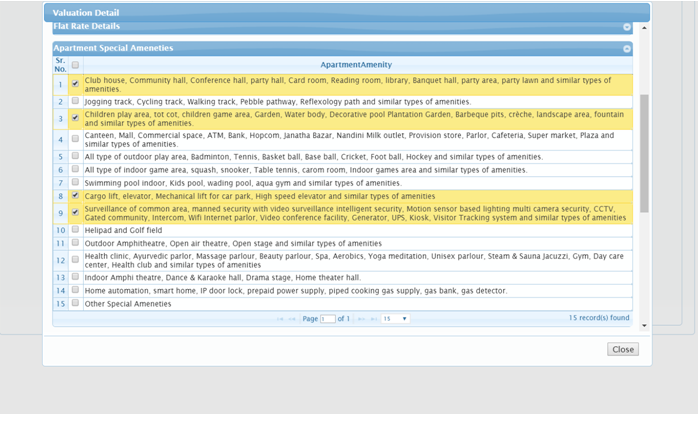
To get the right guidance value, you would need to add additional details for the property like the amenities available at the property, the location of the property, etc. as below
You arrive at the guidance value as follows. The higher of the consideration amount or the guidance value is considered for the registration value.
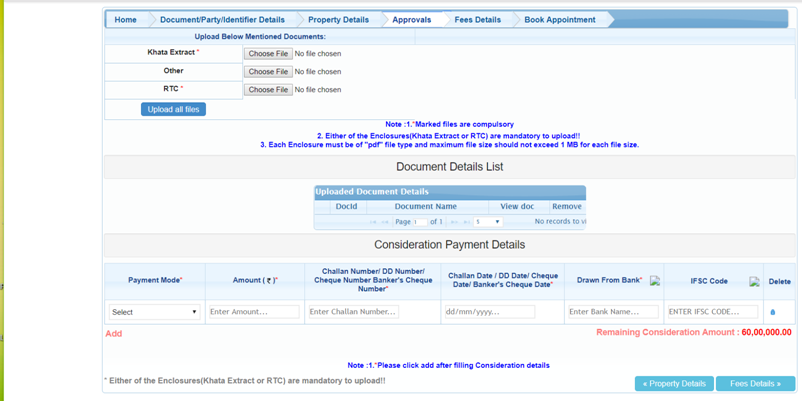
Step 4: Upload documents for approval
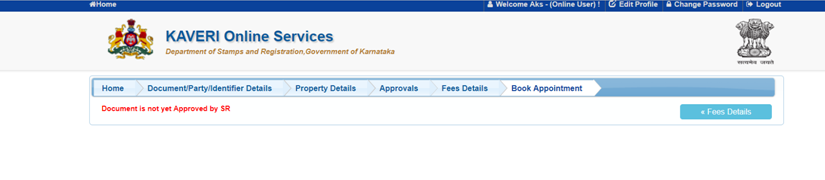
In the next step, you would need to upload one of the documents like the Khata Extract or the RTC. This is mandatory. The same needs to be approved by the sub-registrar’s office before you make an appointment. Consideration payment details also need to be filled in here.
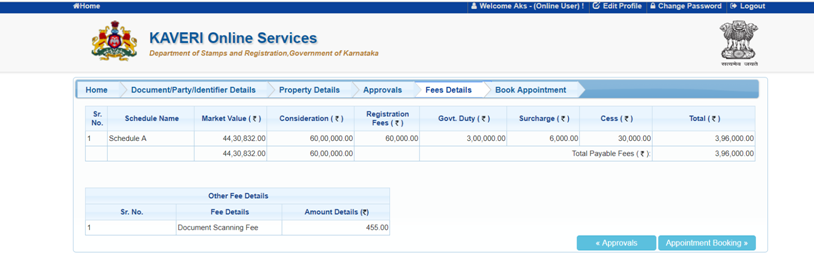
Step 5: Fee details
The next step is for the fee payment details where the entire amount with registration fees, duties, surcharges and cess is displayed.
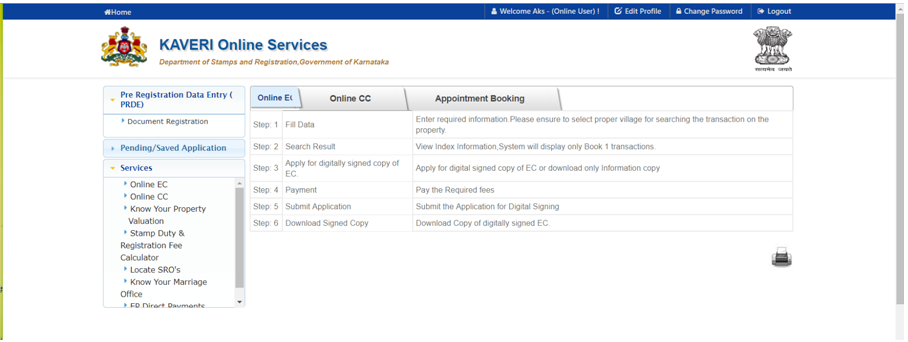
Step 6: Book an appointment
You would be able to book an appointment with the sub-registrar’s office once you receive an approval on your documents and the required fee payment is made.
Once you have obtained an appointment, take a print of the same as the acknowledgement.
Step 7: Visit the sub-registrar’s office for the process of registration
As a final step, you would need to visit the SRO’s office with the relevant documents. The steps there would be
- Verification of the documents by the verifying clerk.
- After successful verification, present yourself for photographing and taking your thumb impressions.
- Sign the summary report and document endorsement.
- Collect the receipt and pay the scanning fee and deficient registration or stamp duty (if any)
- Sign the acknowledgement and collect the original documents after scanning.